The Greddy E-Manage is a very powerful tuning tool that in it’s most basic form allows you to adjust the fuel. Where the E-manage really shines however is it’s ability to upgrade. With the Support Tool, you have a laptop programmable piggy back fuel tuner. What’s more is with the fuel injector harness, you get a 16X16 fuel table which can be controlled VIA laptop. You can also get timing control with the timing harness and even a pressure sensor for those who want even more tuning. It’s not quite a standalone, but pretty close, especially for the money.
Most of this info was updated when the E-Manage is installed and error free.
OK lets get started.
As with any automotive purchase, the first thing you should do is research. Read the FAQ in the following yahoo message group (http://autos.groups.yahoo.com/group/emanage/) as well as some of the messages, other installs, etc… The more research you do at this point, the less head scratching you will do later.
I have decided to break up the E-Manage into parts, this way if something should go wrong, I know where to look. For the First part, I just want the unit in the car. This will give me some minor fuel tuning but more importantly allow me to get familiar with the E-manage.
After doing all my research and laying out the parts, verifying the parts and doing some more reading, it’s time to get started. This is the ECU pinout for my 93 ECU, each car is different. I compared the ecu pinout with the wires that need to be installed for the E-Manage, highlighted everything, took notes and went back to the shop.
For other Subaru ECU charts go to www.ravensblade.com
Install on a 93 1.8L ECU
Red – Power – E29-13
Black – Ground – E29-25
*White – From Emanage to Car – E30-5*
*Green – From Emanage to ECU – E30-5*
Brown – RPM Signal – E29-3
Gray – TPS – E30-4
Install on a 98 RS 5sp ECU
Red – Power – B84-1
Black – Ground – B84-19
*White – Emanage to Car – B84-5
*Green – From Emanage to ECU – B84-5
Brown RPM Signal – B84-64
Gray TPS – B84-8
**** Please note the ‘ * ‘ means that particular wire needs to be cut, whereas the other wires simply need to be spliced into.
When you tap into the wires, be sure to solder them for the best connection, then wrap them with electrical tape. Your Emanage guide will show you how to do this. If you have not soldered wires together before it’s not too hard, just practice off the car with some extra wire and rosin core solder.
This is not intended to be a step by step guide, as some basic understanding is assumed, furthermore I take no responsibility for anything that happens to you or your car.
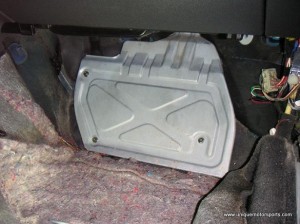
The ECU is located under the kick panel on the passenger side of an Impreza.
Remove the Cover.
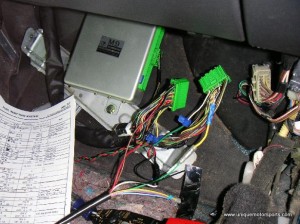
There is the ECU. Notice the blue connectors from when the Field SFC was installed. That is how you DON’T want to install ECU wires. I redid those connections and soldered everything. Also notice the 3 braided wires, those go to the Air/Fuel meter.
This is the scary part. Take out your notes and start cutting. Solder the wires for the best connection. The MAF wires on the Greddy unit come with bullet connectors which should not be used. Even though the E-Manage doesn’t say anything about it, install the gray wire to the TPS.
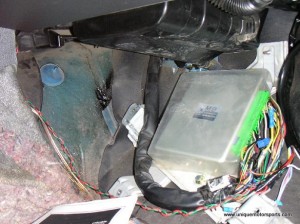
Soldering more wires and reinstall the ecu plugs. The left side of the picture is most likely where the E-Manage will be installed once I get everything wired up and dialed in.
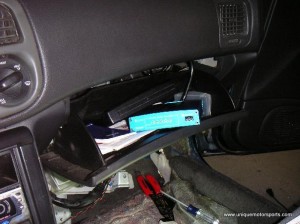
Emanage was temporarily installed in the glove box until for testing and tuning.
In part 2 of the Emanage install, is the injector and timing harness. Also at this point the support cable and software was purchased which allows me to do tuning VIA laptop.


