No one is going to mistake the Aveo for a Race car. Race cars are fast and very responsive. This article is about making the Aveo more responsive while keeping cash in my pocket.
First off, a personal definition of responsive. To me a car needs to feel responsive in a few areas. Throttle response, braking, and handling. This article will focus mostly on the handling aspect. Keep in mind this is an Aveo, so keeping the budget to a minimum while not harming fuel economy will limit some of the results, but can also make for more interesting reading into the world of Aveo tuning.
The most basic approach to improving a cars handling is lowering springs and large wheels with low profile tires. That’s “out of budget” for this project, Not only that, but there are so many other aspects involved in a cars ability to handle well. For example chassis rigidity and flex. Follow along for the other tricks to making a car handle without breaking any banks.
Lowering Springs: Lowering the center of gravity is a great way to reduce body roll and keep the car on track. This is by far the most popular method and looks good too. The key is to match the lowering springs with a good set of struts to avoid a bouncy ride. Springs run about $200. I decided to go with H&R as they were the only springs available at the time for the Aveo. Eibachs are now available, they don’t lower it as much, but I suspect the ride quality is better.
Not at all Too bright
Straighter than a good woman!
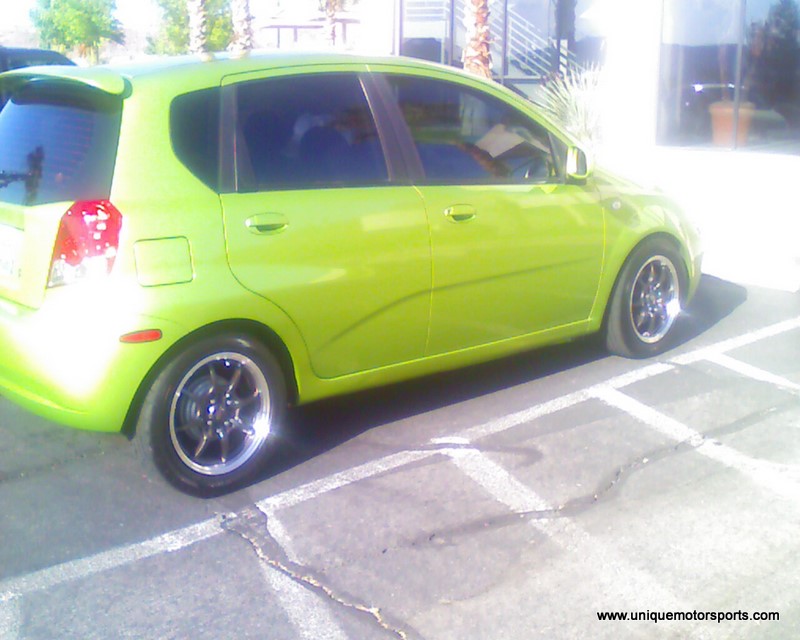
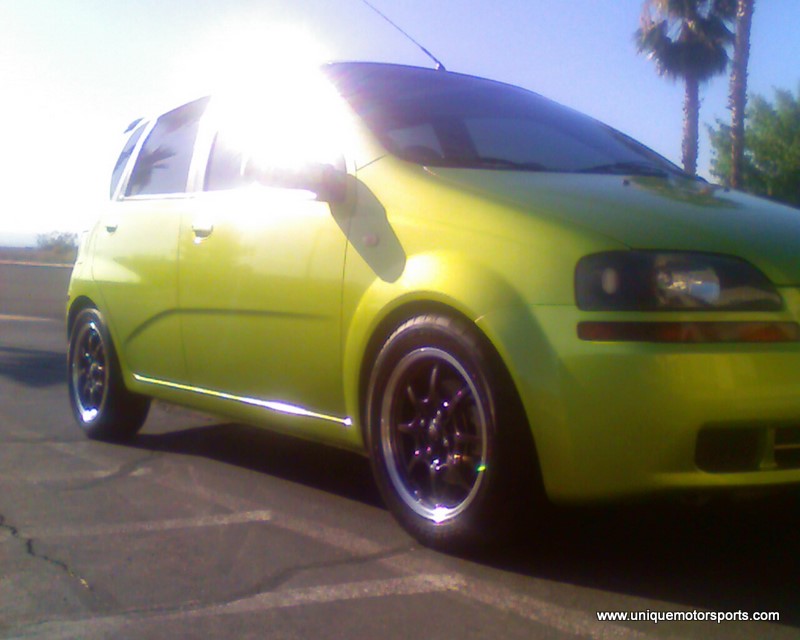
Larger Wheels and Lower Profile Tires: It is possible to go too big on the wheel and too thin on the tires. You need to find a good balance to fit larger brakes, but small enough not to lose too much power. It’s harder to turn a larger wheel, hence the power loss. The first step was to have Falcon Azenis mounted to the stock 14″ steelies with hubcaps. They lasted about 20,000 miles and were replaced with Kumho Ecsta SPT mounted on Rota Circuit 8 15″ wheels. That combo worked quite well until someone stole them out of my driveway. They have since been replaced with another set of Rota Circuit 8’s.

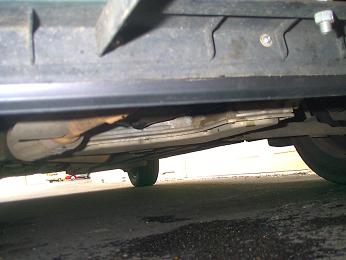
What I walked out to
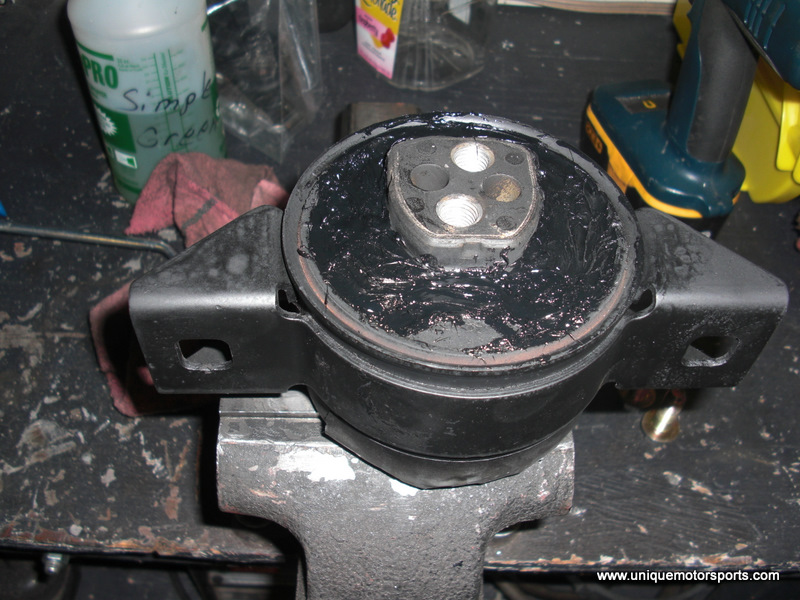
Motor Mounts: Please note the above mounts are actually Daewoo Lanos mounts, not mounts out of the Aveo. A great way to eliminate wheel hop and improve shift feel. Well, that’s not an issue in the Aveo since it barely has enough power to turn the wheels, but I like feeling the engine and don’t want it dancing around in the bay. Aftermarket mounts are expensive and not available for the Aveo, so I will try a $15.00 method. This includes using 3m Window Weld to fill in the motor mounts resulting in a more solid feel.

Touched up motor mount piece and 3m Window Weld

Motor mount as it was recieved
Ready to install motor mount
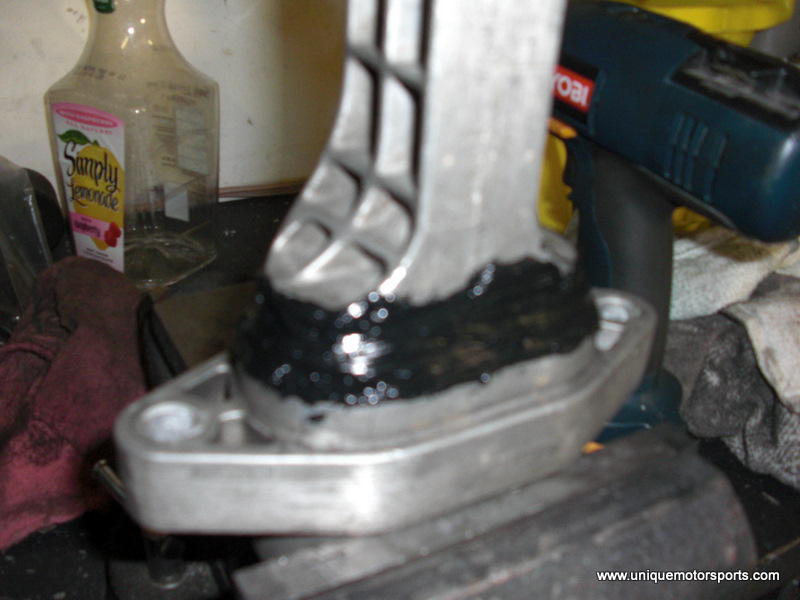
Torque mount stiffened up with windshield glue
Polyurethane Sway Bar Mounts: Please note, the picture below actually shows the lanos sway bar mount and the aftermarket polyurethane mount. The Aveo mount is not flat, one side actually bends down which requires you to bend the bracket for the aftermarket bushing. It’s easily done with a large crescent wrench and vise though.
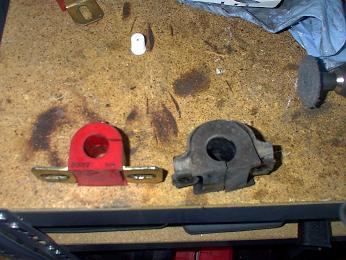
Polyurethane on the left, stock rubber bushing on the right.
The sway bar is what keeps the car from leaning in the turns. It does so by tying the front suspension together with the body of the car. This makes it so if one wheel goes higher than the sway bar, the twisting of the bar will keep the lean to a minimum. I don’t know of any thicker bars available so I’ll be going a different route. I first measured the size of the bar and once I found out it was 17mm, got online and ordered some bushings from Summit Racing. I actually got the black ones so even if someone looks, they won’t know it’s been upgraded. Install is tricky and slow, with an open ended 12mm wrench, but with a creeper and a set of car ramps, this is one mod under $20 that will give you some good results.
Update: The 2006 Aveo has an 18mm swaybar which if you do the math comes to 31% stiffer than the 17mm of the 04-05.
Front Sway Bar End Links: While swapping out the mounts, it’s hard not to notice the 15″ long sway bar end links that are about as big around as a pencil. These things will flex going around turns, so beefing them up a bit should improve turn in. I’m going to see about getting some adjustable end links made up. By having them adjustable it allows me to preload the bar which is like having a stiffer sway bar. This amount of adjustability will help when the chassis braces go in and the rear end of the car is stiffened up.
Rear Sway Bar: Most front wheel drive cars do not come with a rear swaybar. The Aveo is no exception. It does have a semi independent suspension which basically works like a sway bar. The twisting of the axle keeps the lean down. The axle itself is a u shape with no bar in the middle. The Lanos did have the bar. The additional torsion bar in the middle makes the rear harder to twist which is effectively the same as having a rear sway bar. Now given the two bolt holes, it looks like they might have considered putting a rear bar in there.
Strut and Chassis Braces: Strut braces both front and rear stiffen up the chassis of the car making it more responsive. With inadequate chassis support the tops of the struts along with other suspension joints will move mid turn which messes up the geometry and can change the contact patch of the tire to half what you should have. Unfortunately there is no front strut bar available at this time. As for the rear upper strut tower, well, it would interfere with interior room too much, so that’s out of the question. I have a plan to make a front strut bar utilizing stock holes. This might be a good couple of months so stay tuned. I have made a simple Chassis brace that connects the front of the control arms. Between this and the sway bar bushings the car is VERY predictable and has an incredible amount of grip. All while on the stock Hankook tires. Handling is neutral so the rear does just as much of the turning as the front. The Chassis brace can be made with a 5′ section of 3/4″ electrical conduit and a 2″ wide piece of strip aluminum. Drill a 1/2″ hole in the upper corner of aluminum plate for the control arm bolts and two 3/8″ holes down below. Measure the distance to the holes and mark the 3/4″ tubing. You can crush the tubing in a vise to get nice flat ends. Once finished, round off the sharp edges with an angle grinder or bench grinder.
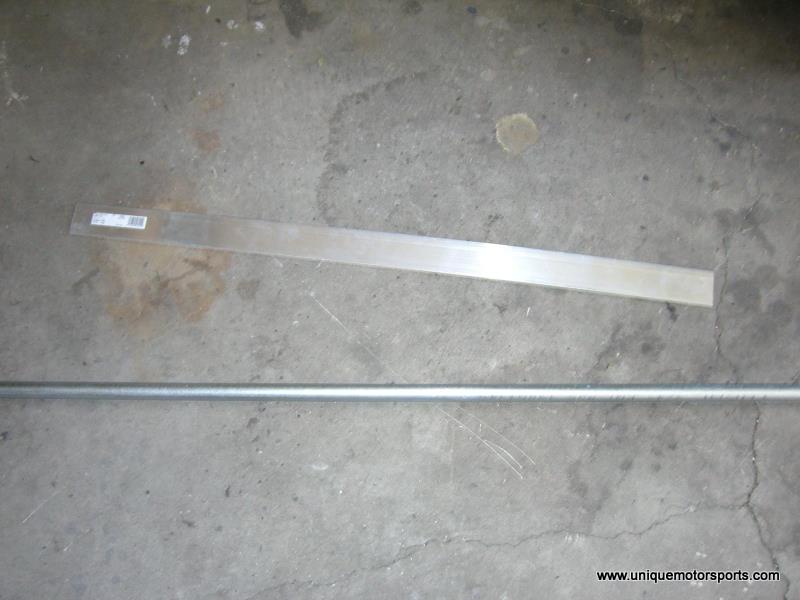
$10 of Aluminum Flat Stock and $5 3/4″ Electrical Conduit
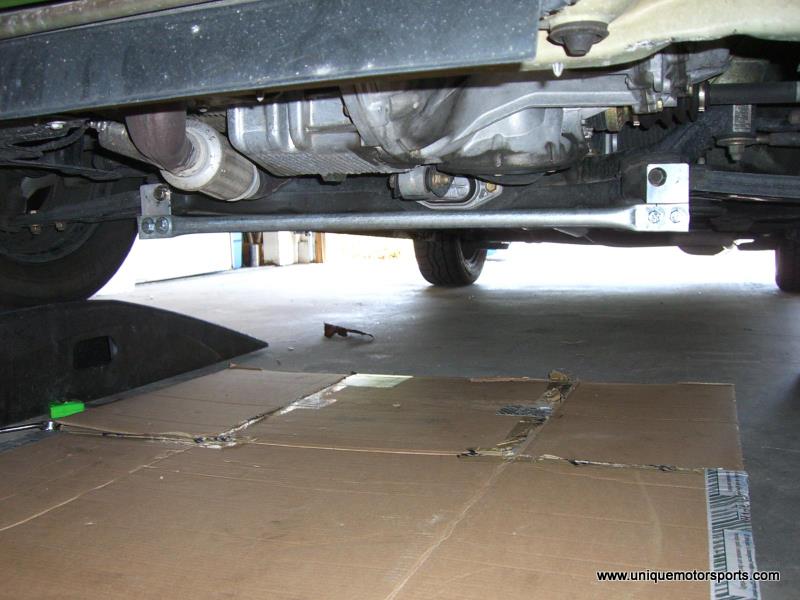
Aveo Lower Control Arm Brace Installed
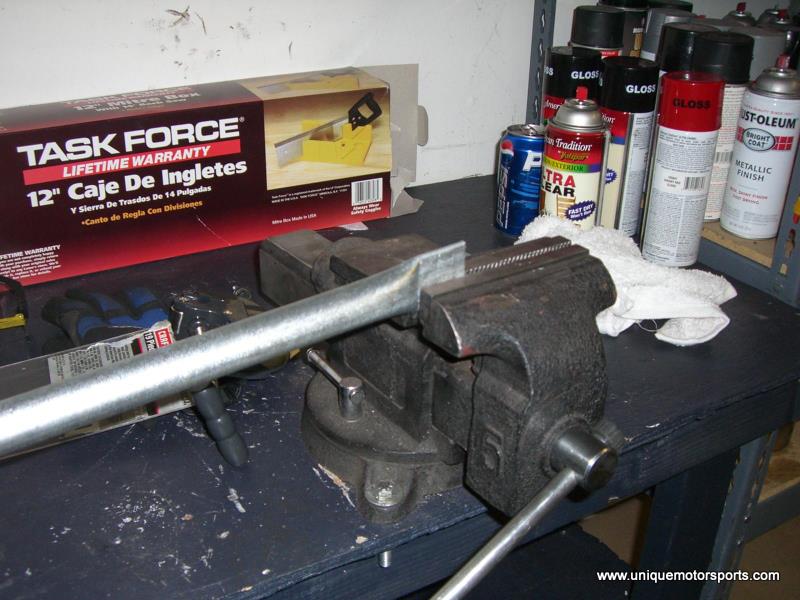
Pinching the Brace ends to make them flat
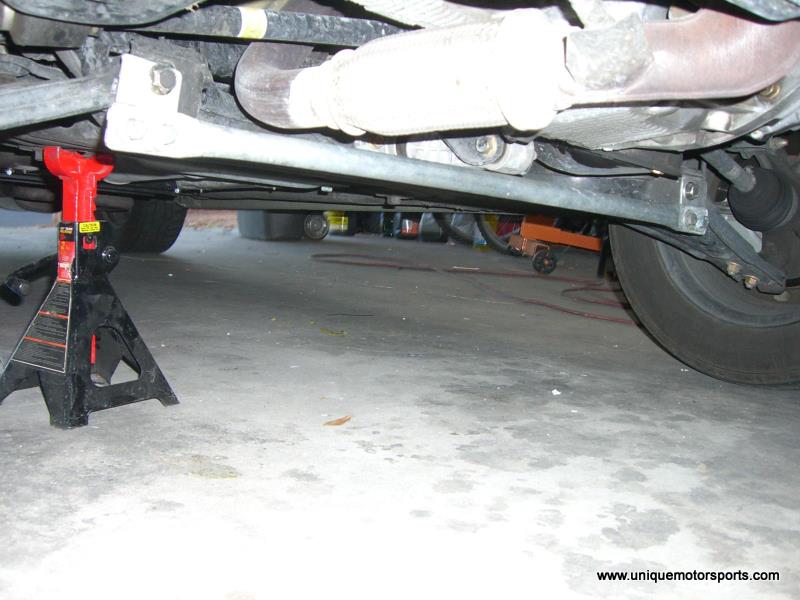
Another View of the Brace installed. NOTE* this was taken later, you want to make sure the car is even with a couple of jack stands or ramps when actually making and mounting the brace.
Note: Some people have pointed out that the lower brace is a little weak because of the aluminum brackets and thin EMT tubing. This is actually by design. The brace is only inches from the ground so if I was to hit anything, the brackets would basically rip off taking the bar with it. The strength while front to back is weak, from side to side is quite solid. This helps maintain the front control arm geometry and thus the 10 MPH increase in speed I was able to pick up on a specific testing roundabout freeway entrance. If it was more solid, a good hit would simply destroy the front of the car. All that said, if the exhaust was redone and the bar could be higher, then I would make it out of square tubing, not some cheap electrical tubing. I have had this on over 50,000 miles as of today (09/08/2010) and while it has scraped a couple times and even battled a rolled up fence on the freeway it still is going strong and has never been replaced.
Front Air Dam: Pictured is the front air dam on the Lanos. You can also see the small extension I put on it. Believe it or not, I could feel the difference at speeds above 40mph. What it does is keep air from going under the car which would create lift. By keeping the air out, you actually increase the amount of down force which helps especially in high cross winds. The Aveo will be getting a Belly tray which has similar effects as an air dam.
Tires: As with most cars, especially ‘affordable’ cars. Tires are one of the best improvements you can make on a factory ride. I went with a set of 195/60/14 Falcon Azenis 615’s off ebay for $300. They have more grip than than I should ever really be using on the road so I’m quite happy with them. As an added bonus, the car is still quiet.
That pretty much covers it. These methods can apply to ALL cars which makes working on the Aveo so much fun. It’s a great test bed for parts fabrication and testing.