When starting out with a base 2005 Aveo, pretty much any interior change can be considered an update. At the same time however; it can be real easy to ‘rice’ out a car. Following with my looking OEM type fitment but better than stock feel, I decided to replace the checker themed panel inserts with some suede or Alcantara looking fabric. I’m not sure what if any difference there is though I’m sure someone does. What I was going for is a nicer look and feel and to darken the interior a little.
This is my first attempt at upholstery work and I must say I’m absolutely impress with the results. For less than $20 and about 3 hours of my time this is what I ended up with. Now for some pictures and some descriptions. I’ll start with pictures 0 and 1 so as not to confuse later in the count.
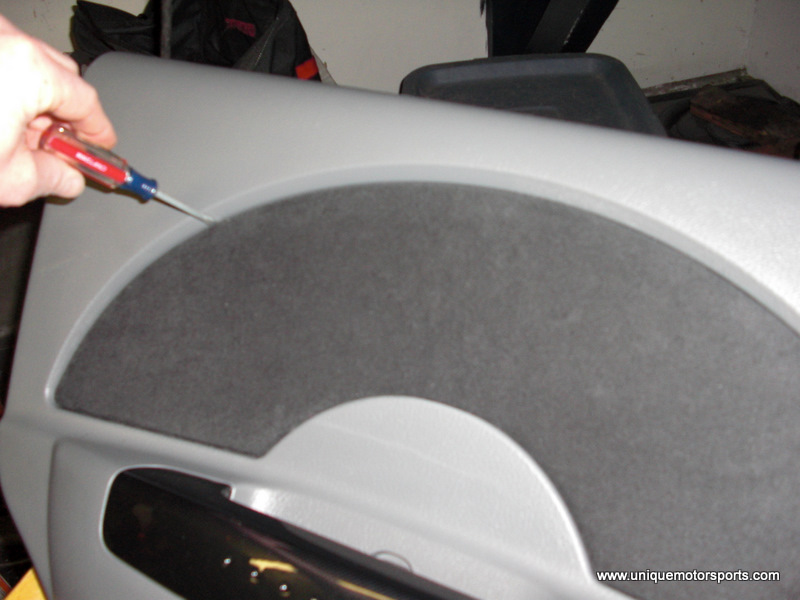
0.+1. – Remove the door knob screw (this turned out to be completely unnecessary as only the trim actually needs to come off). Remove another door panel screw, this one is in the door handle.
2. Lower screw 1.
3. Lower screw 2.
4. Remove the cir clip which holds the roll up knob. If you have power windows and I hope you do, this part will be different. To remove this separate the backing of the knob and push in the panel with your knee. Then a small screw driver will laugh at you as you try and remove the clip. Have a light and magnet handy for when it falls and manages to center itself under the car.
5. Upper trim piece that sounds like it’s trying to break as you pull it off.
6. Back of panel. I was expecting to find screws holding this piece on, however its just one plastic mold.
7. Pull the fabric off… for the other doors I left them on. Once the fabric is pulled, you can use a gentle wire wheel on a drill being careful not to damage the part you will actually see, or one of them fancy eraser bits designed to remove sticky residue.
8. Fancy side up, here you can see the suede I chose. Take your time, the end result is heavily dependent on this part. If you ask your wife to cut the piece and she says she will but doesn’t ‘really’ want to, your results could represent her actual opinion.
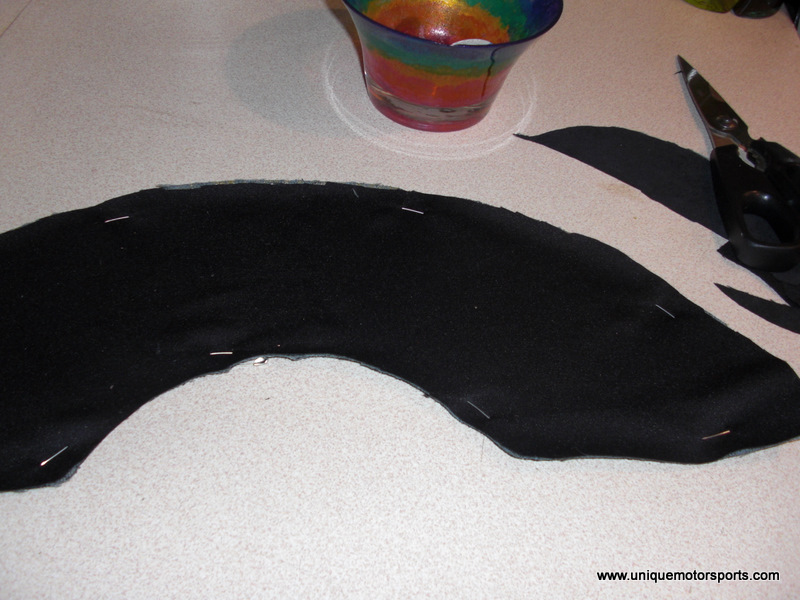
9. Lots of safety pins to keep everything in place before trimming.
10. Trimming the new piece. The left side is different from the right so don’t try and use the same trim piece for all 4 doors. Also be sure to do one at a time, stacking might save time but it’s not about the time its about having a nice clean OEM quality finish.
11. Spray the adhesive spray in a trash or something until it comes out smooth then apply enough to the back of the fabric that it’s good and sticky yet not so much it goes through. The small flat head allows you to tuck the fabric into the slot for a nice clean good as stock finish.
12. First one and the results are spot on.
13. The spray adhesive I used from a fabric store.
14. Prying the fabric off being careful not to damage the plastic.
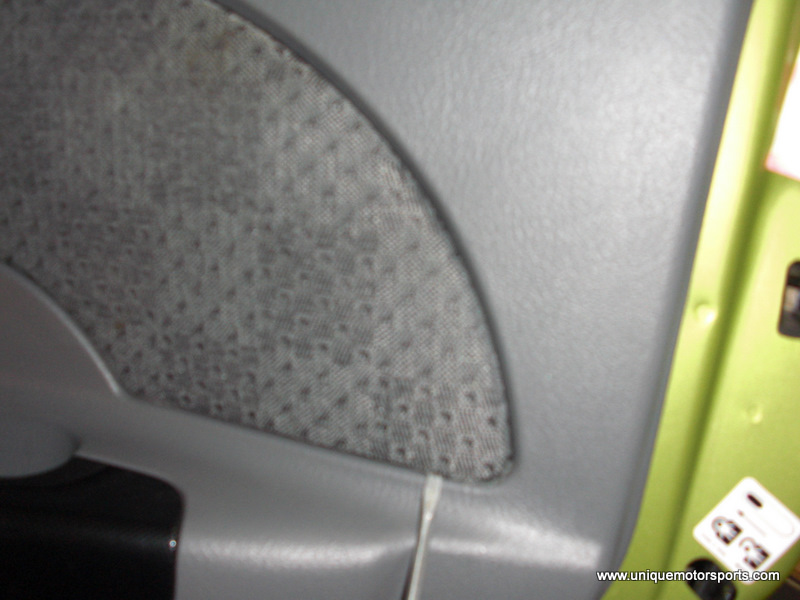
15. A little out of place, but it shows the glue in all it’s glory.
16. It wasn’t until the following day I realized I didn’t have a good before and after shot. Well, I still don’t have a before, but here is a nice after shot taken the following day.
Hope you enjoyed the write up, I would recommend this update to anyone with $20 for a yard of suede, some glue and a few hours to burn.
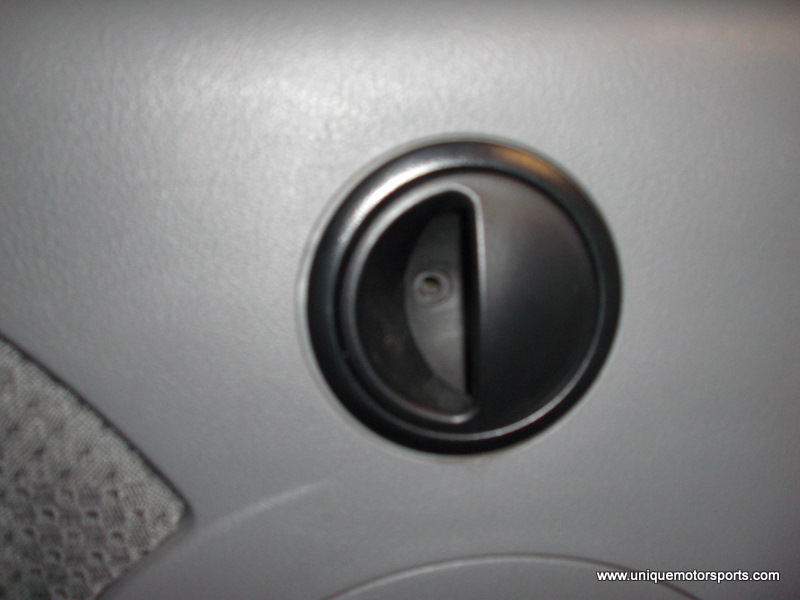
Remove trim around door handle
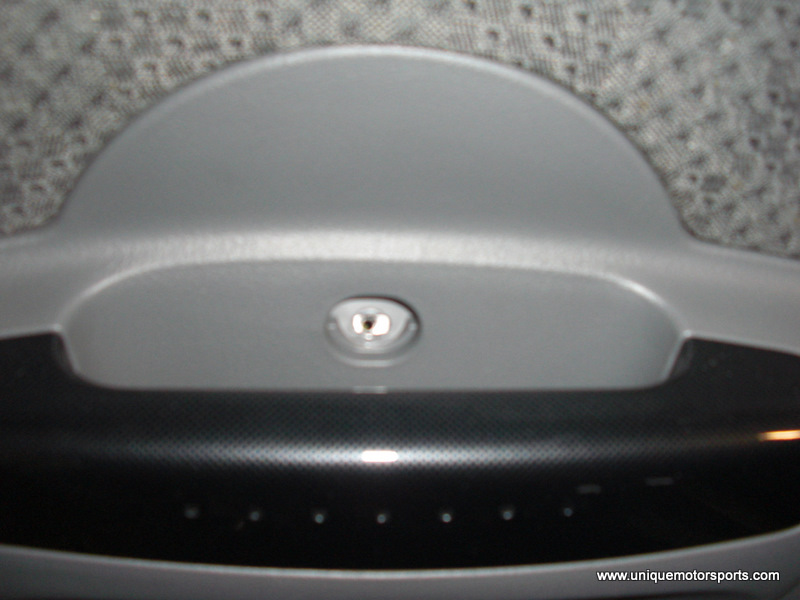
Remove screw from door pull

Another screw down low
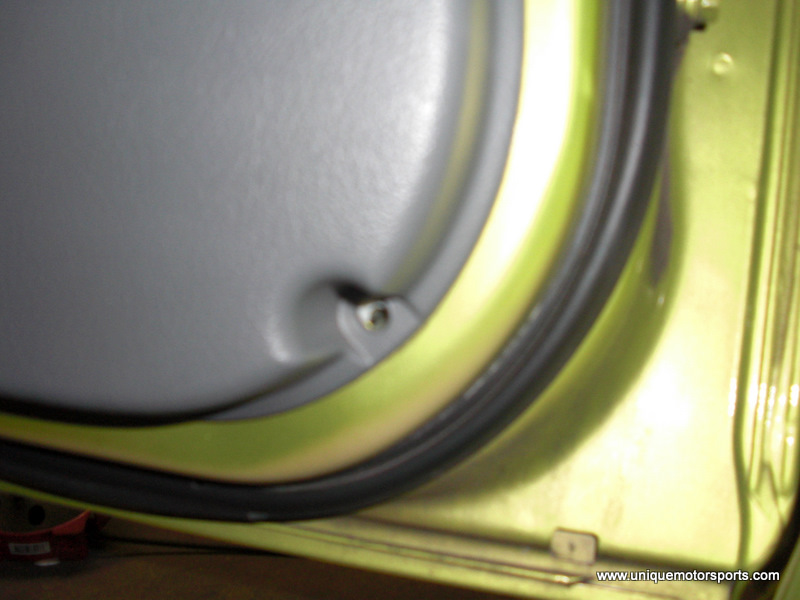
Yet another screw
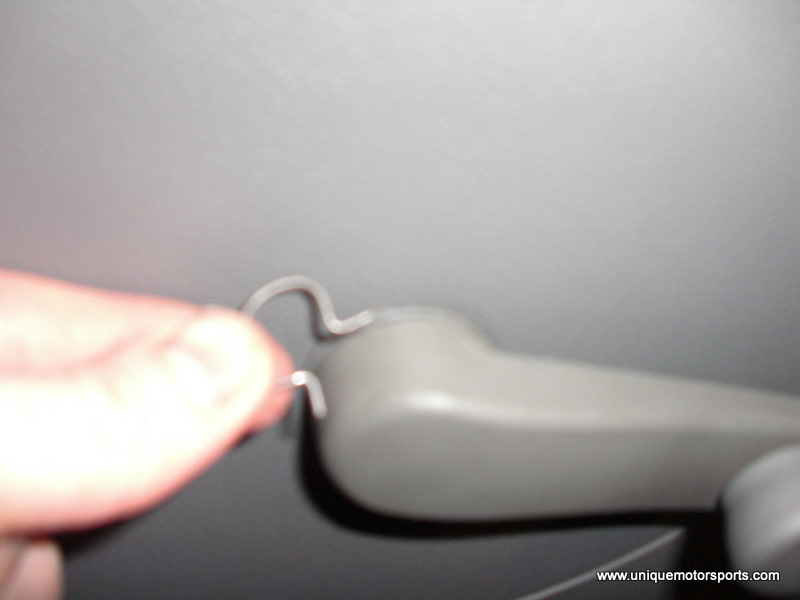
Circlip which will try slipping off your screwdriver sending it on its way to gauge your panel.
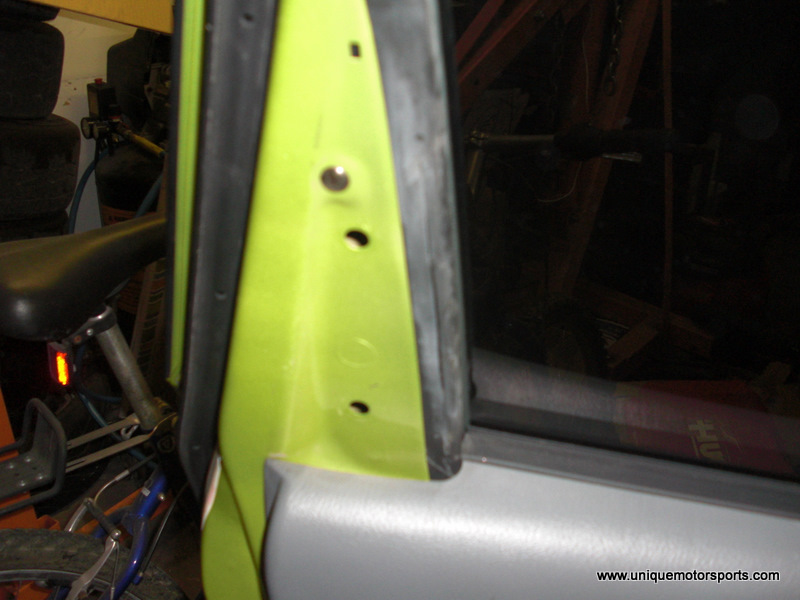
Upper trim piece pulls straight off
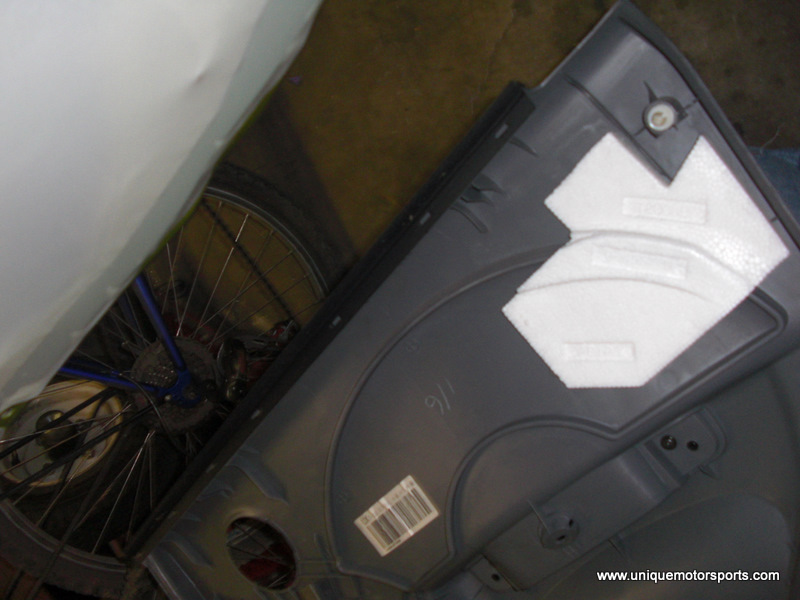
Back of door panel, notice the piece getting updated is not screwed in so removing the door was not necessary
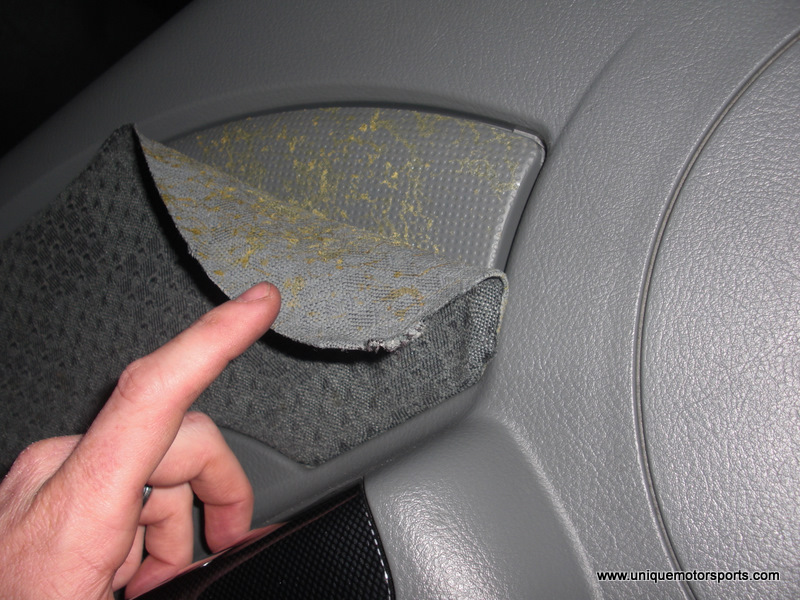
Just start pulling these off, the glue is what you are looking at here
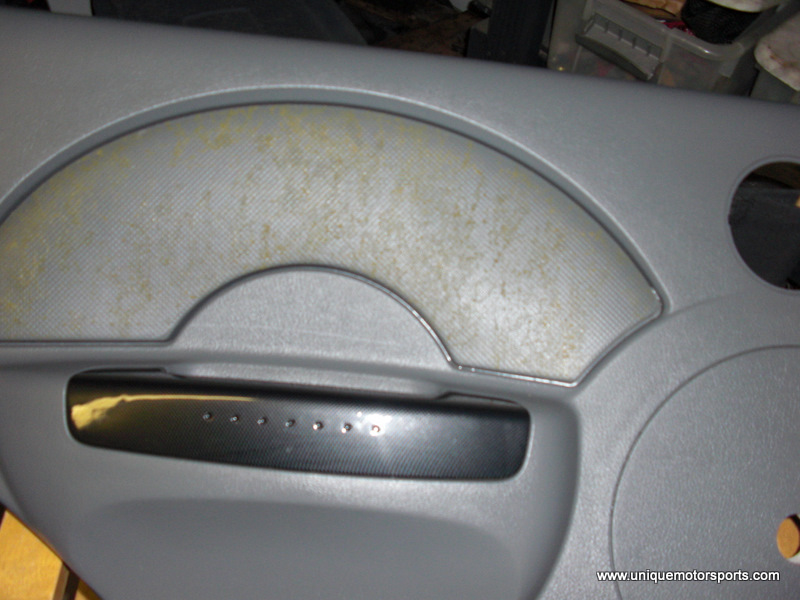
Door fabric all gone
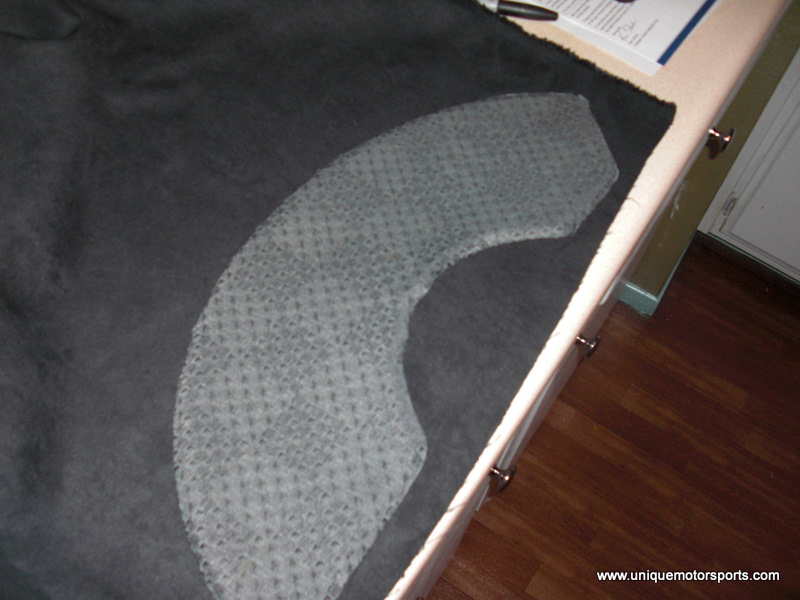
Use the stock peice to trim out the replacments
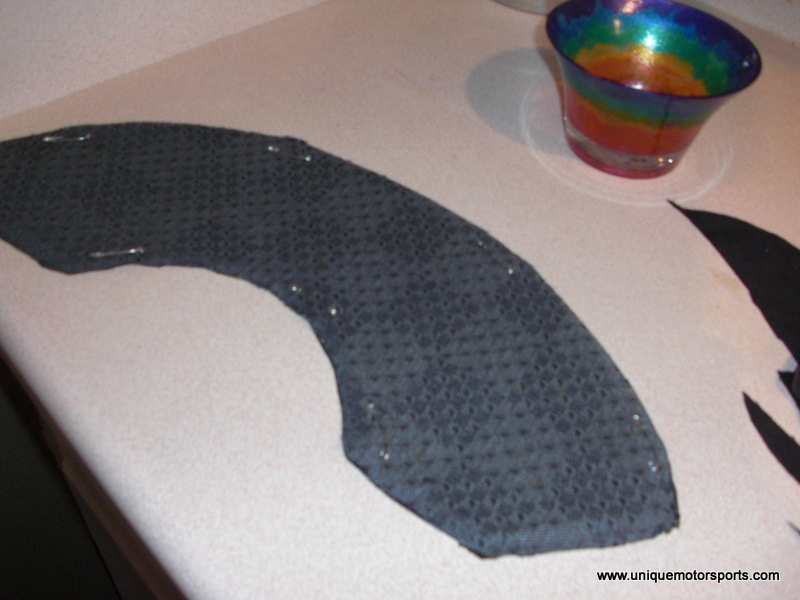
I used a bunch of safety pins to hold everything together and carefully cut around the edges
Back side view
Small screwdriver used to tuck the edges though a spatula or similar would work better and less likely to scratch

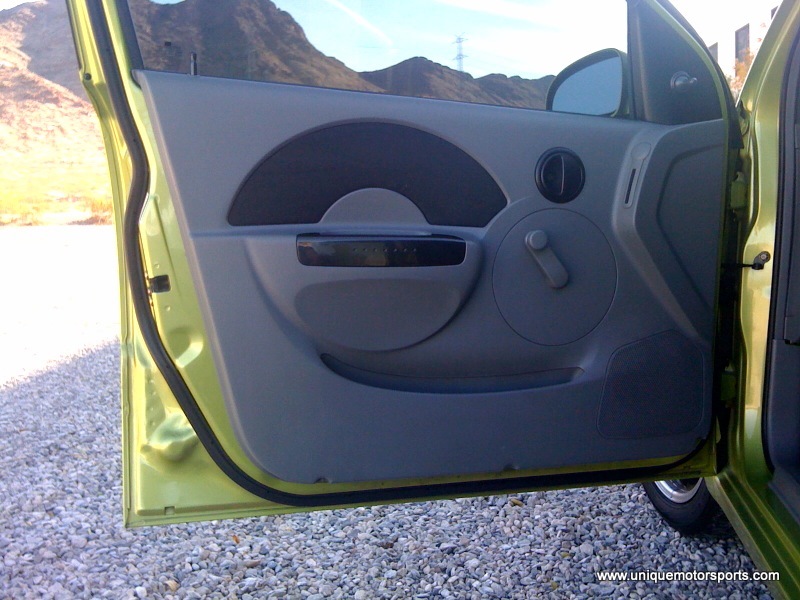
Finished door

Spray adhesive used
Work this out from the corners
Next day during the day showing the results.